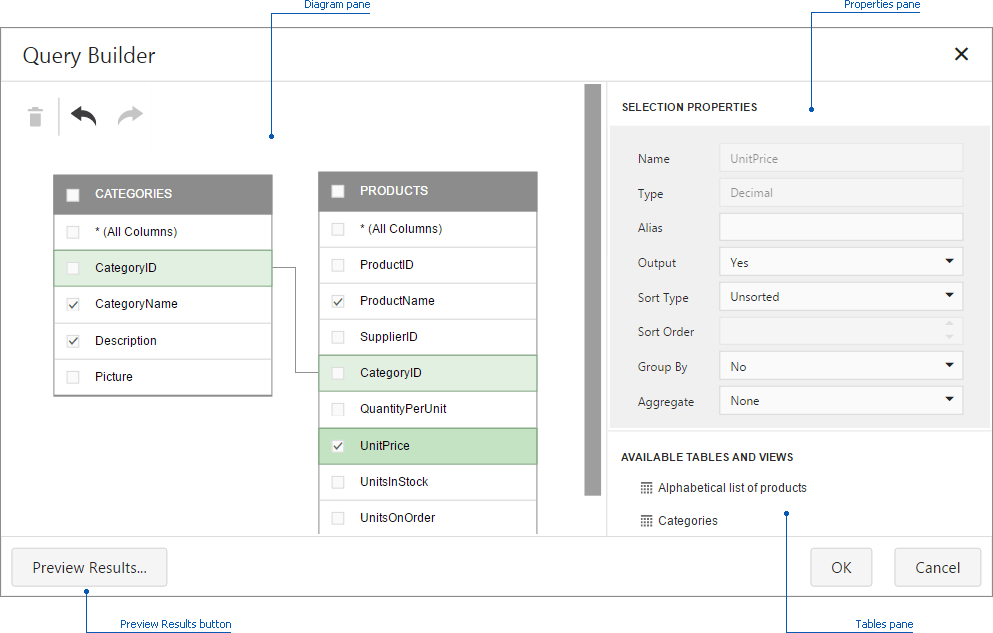
Query Builder
In the Query Builder dialog, you can add data tables and views to the data source, and select which columns to include. The Query Builder automatically joins the related tables, so all you need to do is drag-and-drop.
This topic consists of the following sections.
Add Tables
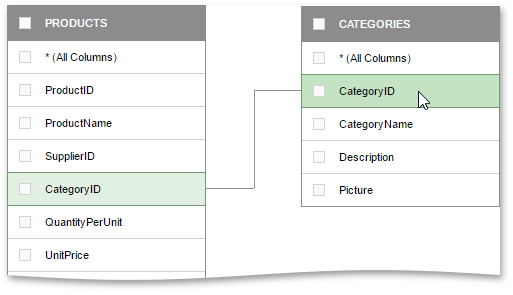
To add the required tables/views to a data source, drag-and-drop it from the Tables pane onto the Diagram pane.
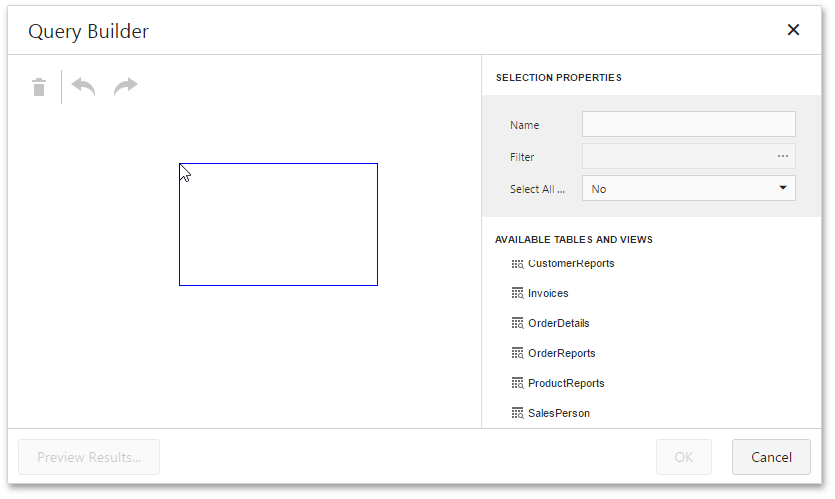
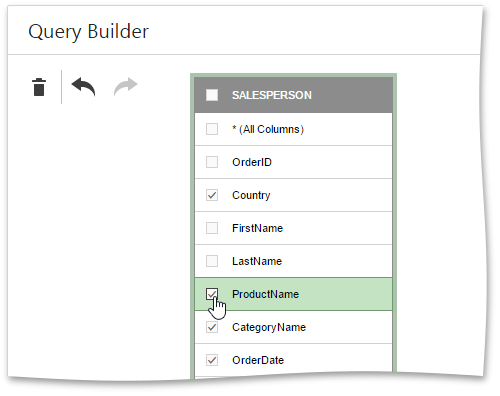
Then, select the required columns.
To delete the unnecessary table, select it and click the
Delete
button (the
 icon).
You can cancel or repeat the action using the
Undo/
Redo
buttons (the
 and
and
 icons).
Join Tables
When you drop a table that has a relationship at the database level with any of the recently added tables, the Query Builder joins these tables automatically.

You can create a relationship between two tables manually by dragging a column in one table to a related column in a different table. A relationship line will be drawn between the two tables.
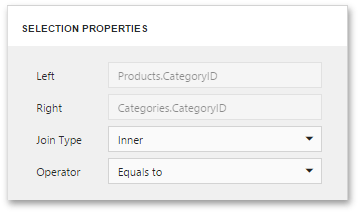
The Query Builder allows you to change the join type (if necessary). For this, select the relationship line and use the Join type combo box in the Properties pane. An Inner join and Left outer join are supported.
To delete the unnecessary relationship, select the relationship line and click the
Delete
button (the
icon).
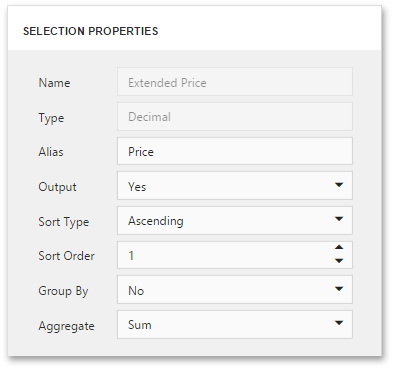
Edit Column Settings
To edit a column setting, select the required column in a table. Then, use the Properties pane to specify the column setting.
The following settings are available for each column.
|
|
Filter Data
The Query Builder allows you to filter a query. To do this, deselect tables and click the ellipsis button in the appeared Filter field in the Properties pane. This invokes the Filter Editor dialog, which provides a visual interface for constructing a filter string.
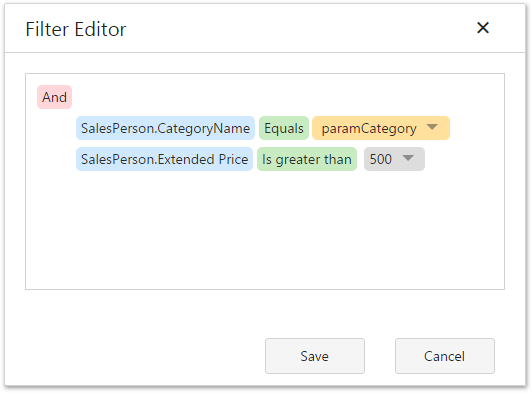
To learn more, see Filter Queries.
Preview Data
The Query Builder allows you to preview data for the created SQL query. To do this, click the Preview Results... button. This invokes the Data Preview window containing data returned after executing the query.
Create powerful mobile forms for your business in minutes